It’s something that I’m sure crops up from time to time in all our lives: Is it about time to build a banjo?
For the last decade or so, the answer around here was, “no, not yet.” Then last fall my friend the local legend J.D. Hutchison died. At his memorial gathering a few weeks ago, inspiration imposed itself: Yes, it was now about time to build a banjo.
This was nothing new to me. Time was, I’d crank out a banjo every couple of weeks. I got pretty good at it. And because the instruments I was working on were primarily hundred-year-old or close to it Vega banjos from that company’s golden age, none without some problem that needed to be put right, I became fairly adept at diagnosing and inventing solutions that cured what ailed ‘em. There is a zen to banjo work (as there is to guitar building and repair or, when you get right down to it, solving the issues afflicting a misbehaving computer). Banjos may not have souls as we understand the word, but if you listen just right you can hear what they want.
One of the things they want is heads made of skin, not plastic.
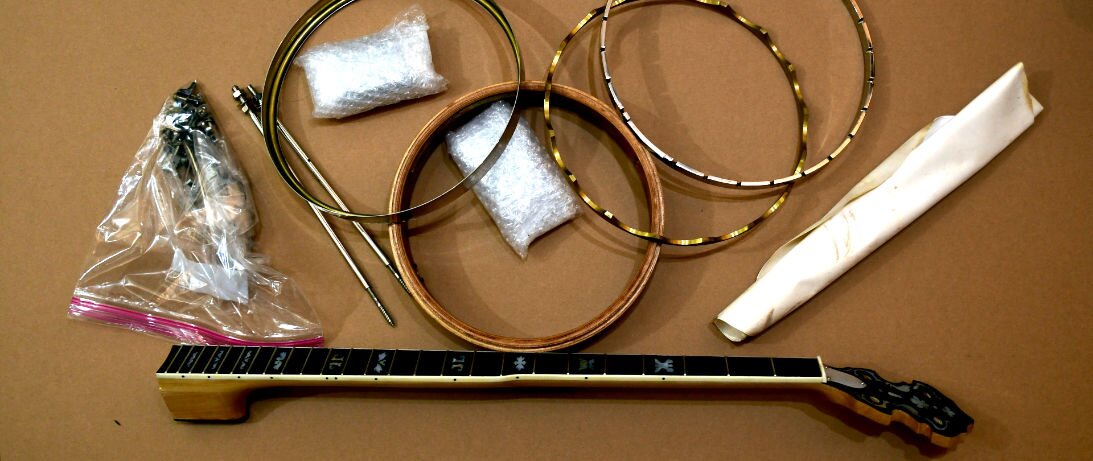
Newly inspired, I collected together the parts I’d need for the job. At the center was someone’s failed banjo project I’d bought at an attractive price a decade or so ago. It was the rim from a 1962 Vega “Ranger” banjo. A monument to the company’s decline, the Ranger was the cheapest or next-to-cheapest banjo in the line at the time. The only part it shared with its still-respectable brethren was the rim — the wooden hoop at the end of the neck.
The defunct-project builder had made some good choices in parts selection. He’d gotten an excellent and expensive reproduction of the famous Vega-Fairbanks “electric” tone ring, that magical metal piece that is not visible once the banjo is assembled but that determines the instrument’s sound. There has been a lot of experimentation over the years with tone rings; in my estimation, the Vega-Fairbanks “electric” is the best.
(There’s nothing “electric” about it. This tone ring was introduced in the last part of the 19th century, when electrifying the nation was all the rage. Had it come out in the 1980s, it would have been called “turbo,” in the 1990s, “digital,” and now, “AI” or maybe “woke.” But it was offered for sale in the 1890s, so “electric” it is.)
The original project builder had also replaced the tension hoop (I’ll explain it later, in the pictures) with a good, heavy, properly notched Vega one from a different and much better banjo. You don’t find off-the-shelf parts for Vegas because while the standard diameter of banjo pots is 11 inches, Vegas are 10 15/16th. (They also have a different sized nut on the hooks, so a regular banjo key is of no use with a Vega.)
There were a couple of choices where I strongly disagreed with the initiator of the project. The first is that it’s generally best to measure before you drill the hole, a view he didn’t seem to share. The second is the matter of plastic banjo heads.
Yes, plastic banjo heads are convenient. Yes, they’re (relatively) easy to replace. Yes, they’re more stable — they don’t sag in the rain or in high humidity. But they’re plastic, dammit, and using plastic for a banjo head, at least for an open-back, traditional banjo, is somehow . . . wrong.
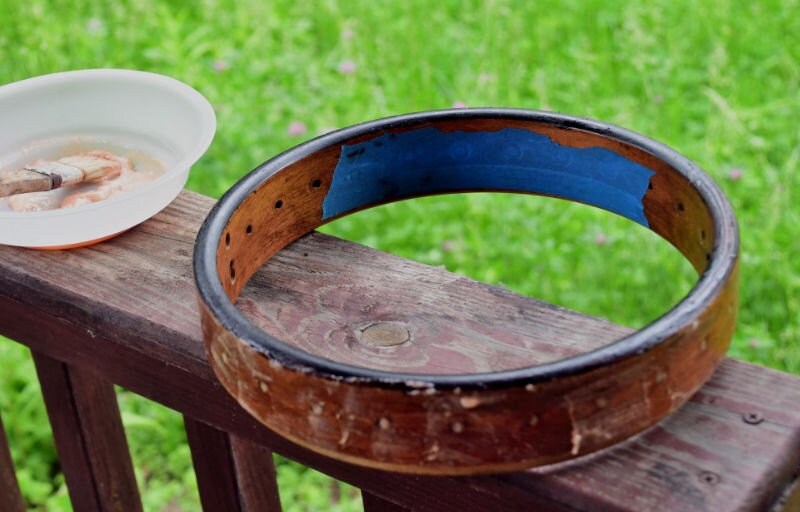
So the first part of my revival of the project last week was to take apart the whole pot — rim plus the other accoutrements I’ve mentioned, and more — and frisbee the plastic head over to the pile of them, removed from old banjos like the malignancies I believe them to be, in the corner of the shop.
I should probably mention what I have in mind. I want to build a porch banjo. This is something you take out on the porch to sit and play, alone or with friends. It’s not some flash-spangled thing to be played only by people with embroidered shirts, too-clean, perfectly shaped cowboy hats, and cowboy boots that have never been in shouting distance of a horse. It’s to be a banjo for playing in the way banjos have been played around here, and east and south of here, since the arrival of the first immigrants. (Though I want it to sound really, really good. A banjo is at base a percussion instrument, and many of the old ones make that part clear. I’d like to make it play notes clearly as well.)
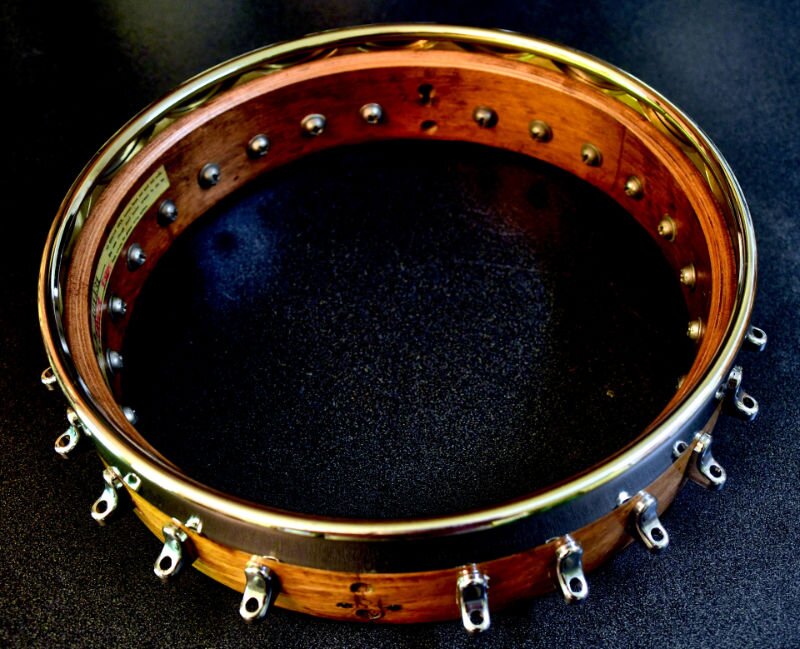
The finish of the rim wasn’t pristine, so I stripped it of hardware and varnish, then recoated it with a dozen coats of very shiny lacquer (for reasons I’ll talk about when I discuss the banjo’s neck, in a later installment). Vega always painted the bottom of its rims black, which I don’t like — it doesn’t complement the wood. So, as has been my tradition, I repainted that edge brown, dark brown, almost-black brown, using Stew-Mac ColorTone, medium brown. The stuff is supposed to be diluted before use, but for this application I use it straight and for a paint brush I use a Q-tip. Doesn’t take very long and is extremely satisfying. Then, of course, a few coats of lacquer over it, to save my shirt later when I’m playing the finished banjo on a sweaty day.
No escaping it — it was time now to stretch the head. I’ve done it a few dozen times and never had a problem, but it always makes me a little nervous anyway.
I’m pleased to see that Bernunzio Uptown Music still has calfskin banjo heads. I’ve always found theirs to be superior to the ones offered by others. It didn’t matter for this project because, I was happy to discover, I still had one from the old days. It had a few stains, what looked like rust but probably wasn’t, on the back. I didn’t and don’t care — a well-used banjo’s head isn’t white for long, anyway.
Every time I’ve given a banjo a new head, I remember the patience of poor Vinnie Mondello, the master banjowright who gave me advice on the subject the first time I did it years ago. As I was doing it I was emailing him what seemed like every five minutes, as if I were a surgeon transplanting a heart for the first time. If he needs a character witness at the Pearly Gates, I’m ready.
The pictures tell it better, but here’s how you stretch a banjo head. First, you soak it in water, room temperature, until it’s soft but not soppy. You dab off the excess water by putting it between a couple of towels and patting it down.
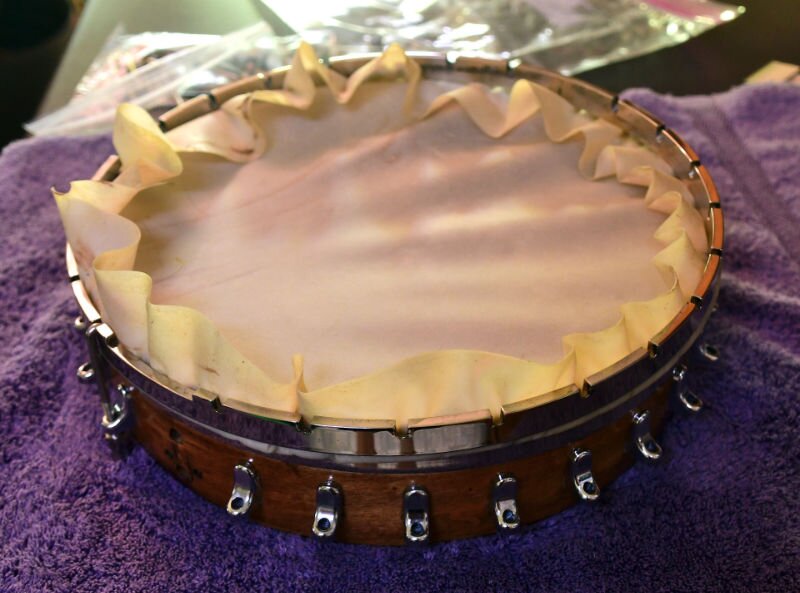
Now you drape it over the partly-assembled pot, adjusting it just so, making sure the correct side is up, after which you place the flesh hoop over it. The flesh hoop is a ring, made of brass and square in cross section, that fits over the head and holds it close to the pot. Think of the rubber band you use to hold the Saran Wrap on the half-can of refried beans you put in the refrigerator.
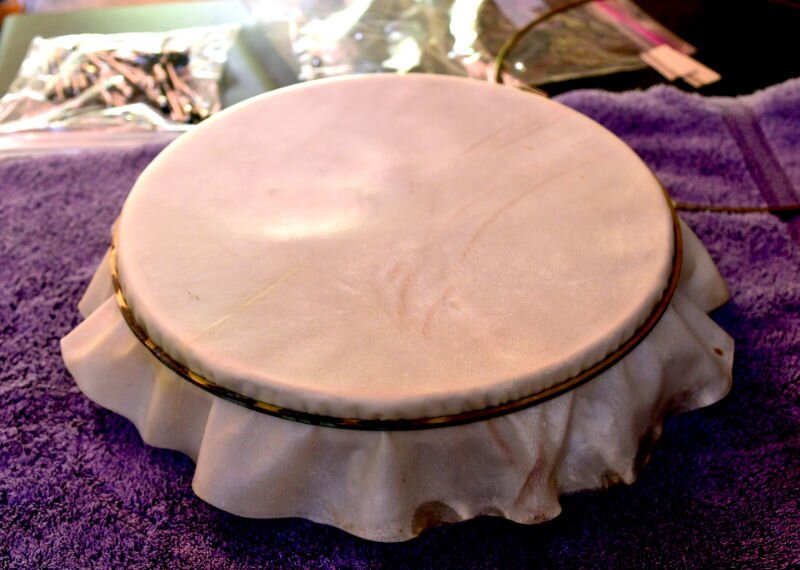
The fun part commences. There is a heavier ring, called the tension hoop, that comes next, but you can’t just slap it on, nosiree. You need to fold the edges of the head over so that they’ll be inside the tension hoop. They’ll be looped around the flesh hoop. You start the tension hoop down over the pot and head, but stop to pull any slack out of the head, eliminate wrinkles, make sure it’s just right. Then you push it down a little farther, just enough that you can loosely install four of the bracket hooks (there are 24 on this banjo). Using the nuts on the hooks, you pull down the tension hoop so that it’s tight against the skin-wrapped flesh hoop but not too tight. Go around and pull here and there on the edges of the head until it’s perfect.
Time now for the razor blade. Using a new single-edge blade, you go around the head on the inside of the tension hoop and trim off the excess. You get one chance at this and if you do it wrong you get to start over, using a whole new head. I used to find it an enjoyable task, almost relaxing, but not this time. This particular head didn’t want to be cut; what used to be zipping around to remove the excess was with this head a real chore. The head cut as if it were made of sinew. I resorted to a box cutter that let me apply a little more pressure. At one point the blade slipped, but as I wrote friends the damage fit under a single BandAid. The process used to take three or four minutes, tops, but this time it took half an hour.
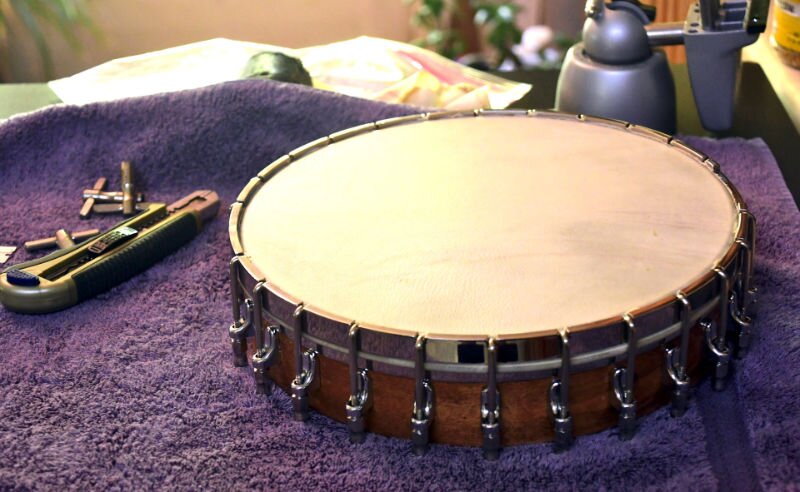
The time had come to install the remaining 20 hooks, which evenly pull the tension ring down to tighten the head. They are not tightened at this point. At this point you set the whole assembly aside to dry. That takes a couple of days — remember, there are two layers of wet leather sandwiched between the top of the pot and the tension hoop. There’s no airflow, so the moisture has to wick out.
When it’s all nice and dry, more tightening takes place. Using a Vega-sized banjo wrench, one goes around the rim, tightening each of the tension hooks. It’s just finger tight at first; then you look to make sure that the tension hoop is even relative to the head all the way around. If it isn’t, then the hooks on the high side are tightened to pull it down. If it is, then you put the pot head-down on a towel once more and begin tightening, first the hook at 6 o’clock, then the one at 12, then the one at 6:30, the one at 12:30, and so on, tightening by half a turn of the wrench. By the time you’re all the way around, the first ones you tightened will be loose again, so the whole business starts over. There are several trips around the banjo before it’s uniformly stretched. Tapping the head should now result in a somewhat drum-like sound. The goal is a head that makes the rap of a snare drum when you flick it with your finger.
The old hill-country banjo players used to say that you tighten the head until it bursts, then back off a quarter turn. It’s a good joke and not far from the truth.
I usually give it another day, to kind of acclimate, and go back to retighten it, going in quarter-turn increments this time. It keeps sounding better and better, but in this case patience is definitely an essential virtue. Once it can’t be gotten any tighter without risking it bursting — something you don’t want to experience and especially don’t want to experience twice — it’s time for the Mondello trick. (If it were medicine it would be the Mondello procedure; in chess it would be the Mondello gambit.)
This is a cool trick. You put ordinary, room-temperature water in a squirt bottle and mist the head, not at the edges but in the middle, until it has softened a little. Then take up another quarter turn all the way around. I don’t remember if this was Vinnie’s idea or my own invention, but at that point I hit it with a hair dryer set to low-warm. I keep tapping the head while it’s under the dryer, in part to make sure it’s not too hot but mostly for fun, because it is amazing hearing the pitch of the head change from second to second.
This procedure can be repeated a few times; I suppose at some point it becomes superfluous (or bursts the head). I do not know what happens in the structure of the head, but the effect seems to be an evening of the tension within the head itself, making it more uniform all the way around.
Then you’re done. (Think I could get a job writing assembly instructions for Ikea?) When you look at the pictures it makes more sense.
All that remains now is to drill the hole for the fifth peg (in the neck), drill the holes for the coordinating rod screws (in the neck) and attach the neck, install the tuning machines, install the tailpiece, install the armrest, and string it up. Oh, and learn to play it.
Those things will wait for another installment, coming soon in this space. 
Dennis E. Powell is crackpot-at-large at Open for Business. Powell was a reporter in New York and elsewhere before moving to Ohio, where he has (mostly) recovered. You can reach him at dep@drippingwithirony.com.
Pass along this article.
Never Miss Another Article from Dennis E. Powell.
You need to be logged in if you wish to comment on this article. Sign in or sign up here.

Start the Conversation