Nowadays it is difficult to get a grasp on what we could reasonably call reality.
From the monkey circus in Washington that literally markets the notion that what is real is whatever just popped into the president’s head, to the idea that “science” is whatever is being pushed by one political party or the other, to very nearly everything one sees posted in the internet’s fever swamps, we’ll get no help in discerning what is real. And don’t get me started on “artificial intelligence.”
Okay, fine, I’ll play. If that building on falsehood is not to my taste, I’ll start with what I know is real and work from there.
I’m talking about photography. Of real things as they really exist.
But I’ll try to pursue reality in a way that circumvents some of our physiological limitations as humans, by converting what we can’t see into what we can.
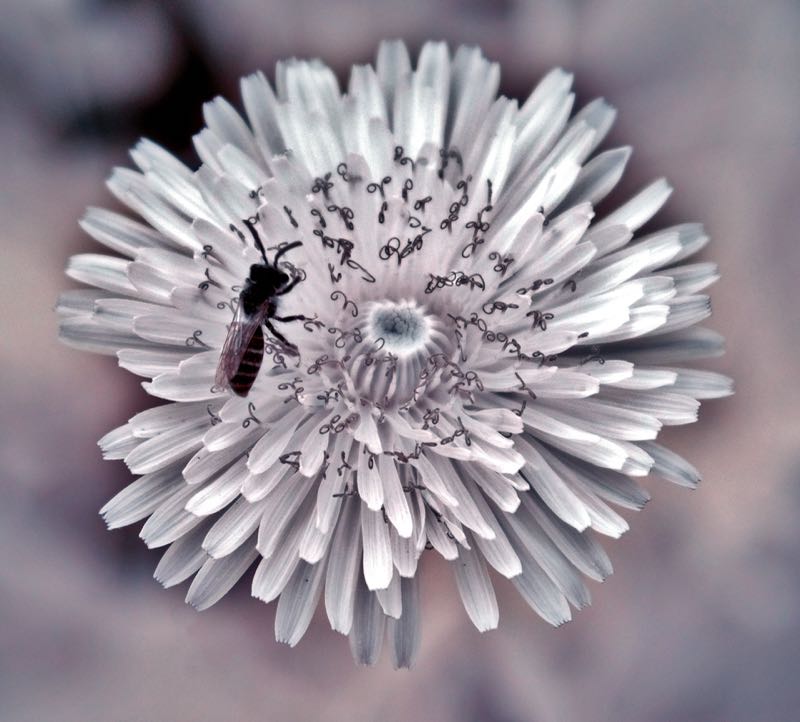
We have vision, but it is surprisingly limited. What we call “visible light” is what is visible to us. Many other living things can see a much larger part of the electromagnetic spectrum, of which the part we can see is but a tiny slice. You might have marveled at ultraviolet pictures of flowers and wondered why those patterns would even exist if they’re invisible. The reason is that they’re not invisible to those who matter to the flowers — the creatures that pollinate them, for instance.
If you want a good demonstration of how little we see, make friends with someone at the geology department of a local college or university and go rock hunting with him or her at night, using an ultraviolet light source that causes some minerals to fluoresce in vivid colors. Pick up a few brightly glowing pebbles and the next day look at them in white light. They’ll appear fit only for driveway use.
Ultraviolet is captivating, but it is also very complicated and dangerous. If you don’t know what you’re doing, you can damage your vision and otherwise cause yourself real, permanent harm with ultraviolet. We use UV blockers at the beach for a reason.
From a photographic point of view, UV requires complicated skill to produce anything worth the trouble.
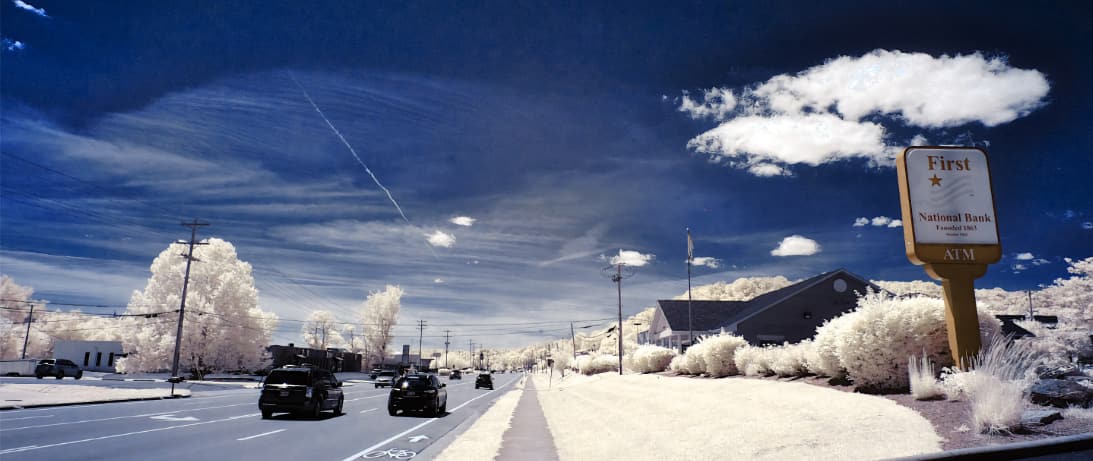
On the other side of the visible light part of the spectrum, though, there is infrared. It is relatively easy to make stunning photographs in that part of the spectrum and it is a lot less likely to hurt you.
It is not on purpose that I seem to get the infrared photography bug in May each year; it wasn’t until I noticed last week the dates of the pictures I’ve made in previous years that I realized that May is when the compulsion strikes, year after year.
We cannot see infrared light, so infrared photography is a process wherein the infrared light we can’t see is converted into something we can see. I realize that I said above that we’re talking about reality, and already here I am substituting one thing for another. Fair enough. But if infrared photography doesn’t let us see infrared light itself, it lets us see how infrared behaves, which is real, and the results can be striking.
How do you make infrared pictures?
Here’s the short answer: Make sure your camera doesn’t have an effective infrared-blocking filter. (Most cameras do.) You do this by pointing your television remote at your camera and, looking at the camera’s live view screen, push the remote’s various buttons. If you see a spot of light from the remote, at least some infrared is getting through.
Get an infrared filter for your camera, choosing the wavelength you want, from 590nm, the mildest, to 850nm, the severest. They go beyond that, but these are enough for us. (I have two cameras converted to provide 590nm — nanometer, the wavelength of the light admitted — and 720nm light. The pictures from these vary due to the amount of visible light that’s allowed into the mix. I can add a more restrictive filter to either; for instance, if I put an 850nm filter on either of the cameras I will get the same result, because the 850 wins. At that point, there’s essentially no visible light coming through.)
Going outside — begin on bright, sunny days, because that’s when infrared is most abundant — use your camera’s manual white balance function to set its white balance on something green; a patch of healthy grass is standard. You need to do this every day you go out to shoot, and sometimes several times in one session, because the light changes during the course of the day, just as white light does.
Then shoot away!
Taking infrared pictures is like the good old days of film photography in that you can’t immediately know if the pictures you have made are any good or not. The equivalent to darkroom work when shooting digital infrared now takes place on the computer, using one of the commercial applications or, my favorite, the entirely free GIMP. Open your picture and go to the “white balance” setting. Change it to “Auto” and you will see a remarkable change. (Yes, the white balance in your camera is different from the one in your photo software.)
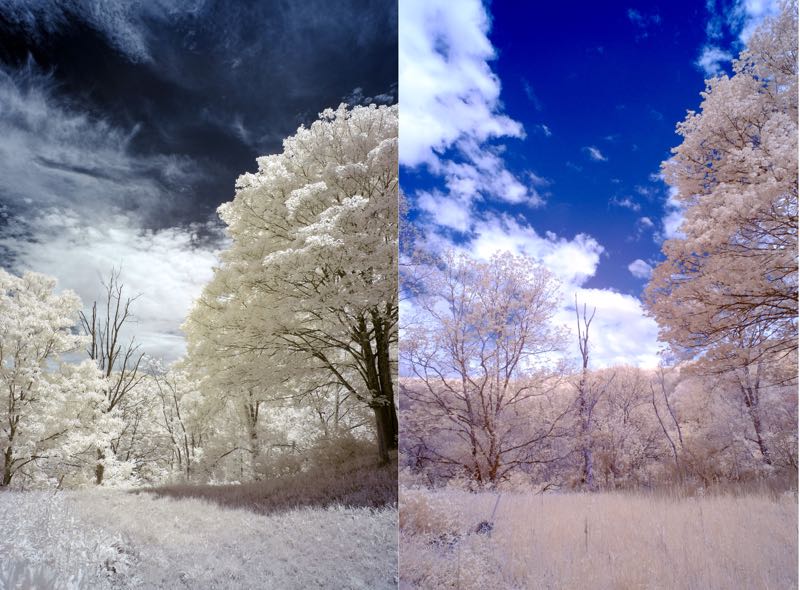
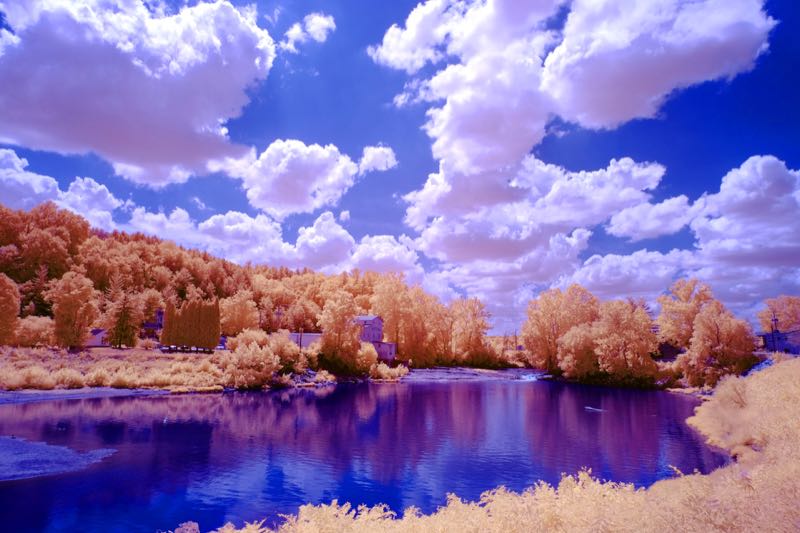
Most people who do infrared in hope of color results will choose to take another step. Find the color channel control and change it so that there is zero blue and 100 percent red in the blue channel, and zero red and 100 percent blue in the red channel. It is easier than it sounds. Now you have a genuine color infrared picture employing “false colors” for the parts that are otherwise invisible infrared, and the skies in your pictures are now blue instead of orange. If you’re shooting anything above 800nm, you won’t need to do the color swap, because you’re in the area of pure infrared and there’s no color as we know it there.
When I started making digital infrared pictures more than a decade ago I got all excited, as I suppose everyone does, over the bright carnival colors. And I was surprised when real photographers, genuine artists, poo-poohed my work. But they were right.
The colors produced in infrared photography are gaudy and festive and exciting, but they’re not something you’d really want to live with on your wall for years. If you make infrared pictures, by all means knock yourself out with the color stuff but don’t be surprised if you discover that 590nm infrared makes what looks like autumn foliage all summer long, and, 720nm — my favorite — makes the world look as if it has erupted, grass, too, in cherry blossoms. (If you’re using an 850nm filter, you won’t be shooting in color at all.) In Japan and much of the rest of the world cherry blossom time is exciting, but that wouldn’t be the case if it were cherries were in bloom all year.
So the infrared color novelty might, probably will, and should wear off for you.
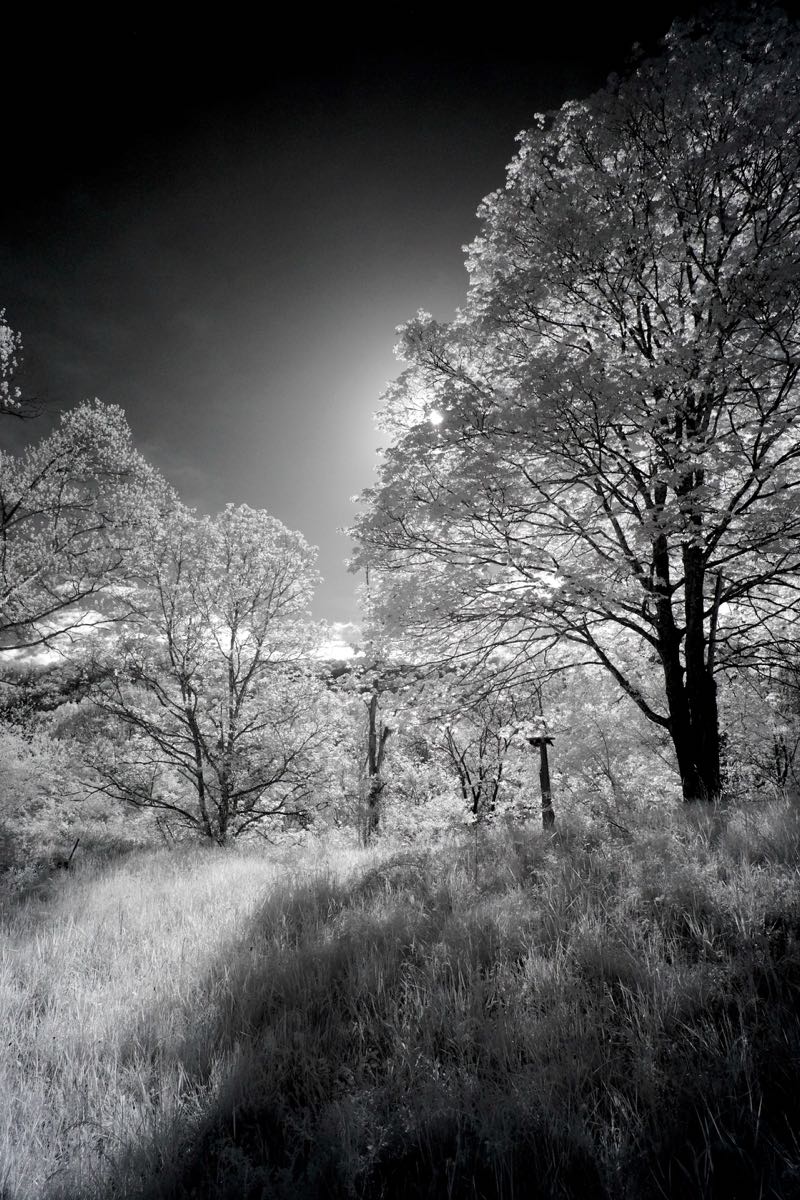
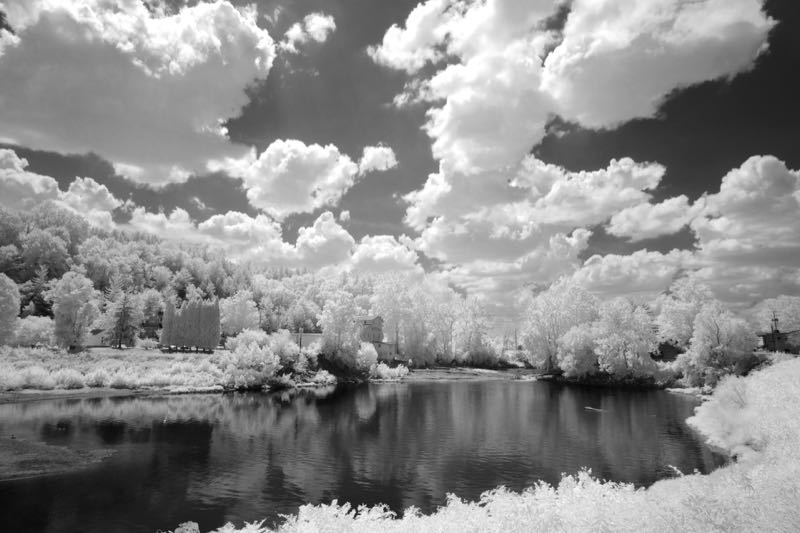
Ah, but there is black-and-white, often called “monochrome,” infrared. That’s where I think the real art is. That’s where we go from festive to dramatic. Color infrared lets you know instantly that this isn’t a normal picture. But black-and-white infrared, with effects that range from subtle to very stark, produces more of a “what’s going on here?” effect. If you want your normal landscape pictures to look as if maybe Ansel Adams made them, monochrome infrared belongs in your bag of tricks. Greenery tends to be almost white, though detailed, and blue skies become very dark, sometimes almost black. Clouds are cottony and detailed. You will get hooked, and you will get pictures you can live with for a long time, pictures that are more than novelties.
Since all of this is in the realm of the experimental, unless you’re willing to be disappointed sometimes, maybe willing to fiddle a bit with your electronic “darkroom,” you might not find infrared work enjoyable. There are surprises. For instance, pictures of people made in infrared are often pleasing in a ghostly sort of way. But they also sometimes see through the top layer of skin and into the blood vessels below, making it look as if your subject has a road map superimposed. I’ve never figured out a way to control this (but I’ve not spent much time trying.) If the person has tattoos, you’ll be surprised at how vivid they become.
The good thing is that learning to shoot and process infrared, really nailing down the basics, takes no more than an hour. Then you can spend as much time as you want making pictures and fine-tuning them to your liking. You’ll find it satisfying.
And unlike so much of our world today, it’s real. It’s just an aspect of reality that can’t be seen unless you reveal it. 
NOTE: I’ve given you enough information here to get you started, but there’s more to learn — for both of us! — so here are some places where you can increase your knowledge. A good primer on IR photography can be found here. Much the same information is offered in a different style here. When I was starting out with infrared I got a lot of help from people in the forums at Digital Photography Review. If you find yourself sufficiently interested that you end up wanting to get a camera converted for IR use, I can recommend two places that do it. My 720nm camera was adapted by Kolarivision and my 590nm by LifePixel. They both offer advice and are friendly and helpful. And they both offer cameras that have already been converted. There are others who do conversions as well, but I’m familiar with these two and have had happy results dealing with them. (And no, I do not benefit if you do business with them.)

Dennis E. Powell is crackpot-at-large at Open for Business. Powell was a reporter in New York and elsewhere before moving to Ohio, where he has (mostly) recovered. You can reach him at dep@drippingwithirony.com.
Pass along this article.
Never Miss Another Article from Dennis E. Powell.
You need to be logged in if you wish to comment on this article. Sign in or sign up here.


Start the Conversation